Hi, again! We have made a lot of progress in the last few days. This vintage Airstream renovation is definitely a roller coaster ride, full of lots of ups and downs. Let's start with the ups!
We made two trips to Lowe's and a trip to AgriSupply for materials.
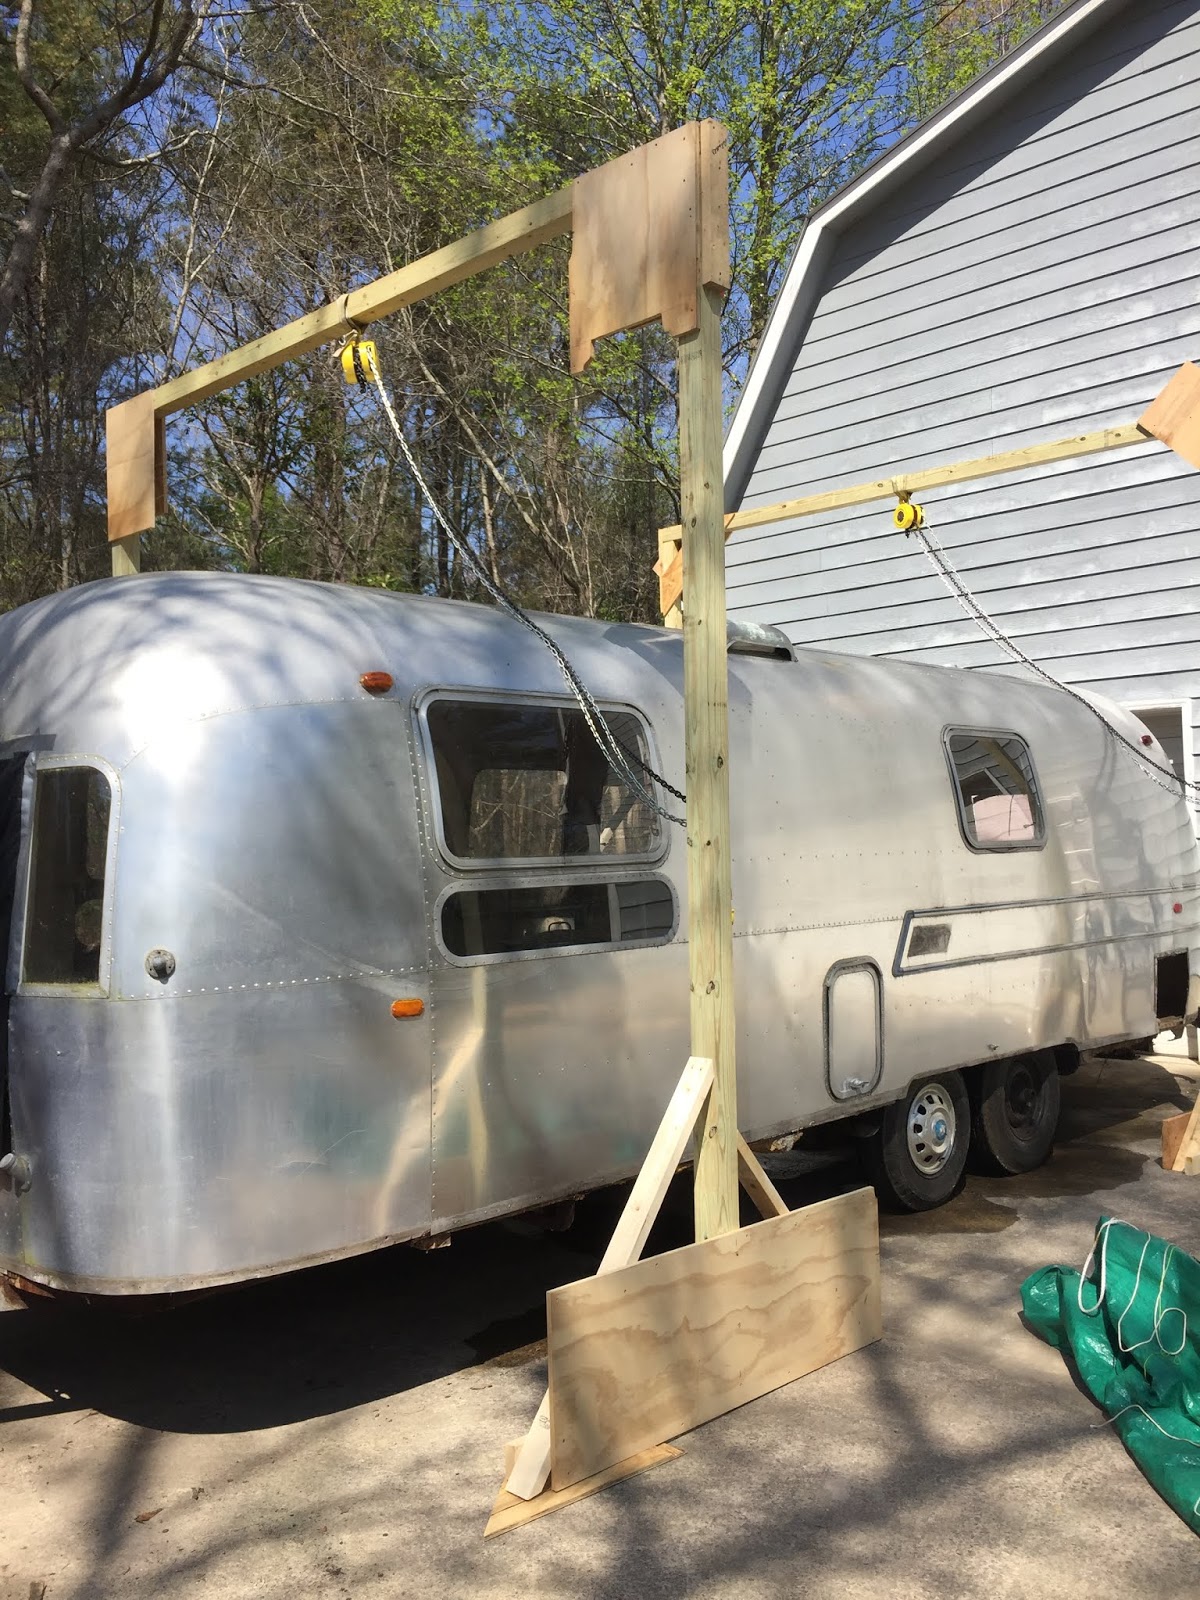
The first time we stood this up, the 4x4 fell on my head. So, we decided to work smarter and use the tractor to stand up the other side.
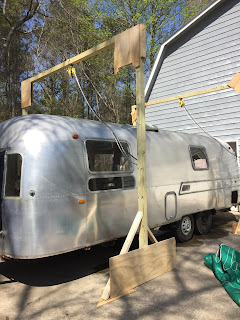
We built scaffolding to raise the shell of the Airstream off its
trailer. We bought lumber at Lowe's, and then made a trip out to
AgriSupply to buy block and tackle hardware to lift the shell. We
learned lessons about what not to do the hard way. We used 4x4 lumber
for posts and crossmembers, and it was not adequate for the task. So we
spent another day trying to reinforce our weak design with extra 2x4s,
screws, straps, clamps...it looks like the Clampetts built it, but it's
holding. Now the shell is lowered to the ground, resting on 2x4s, so we
hope that it's secure enough to survive blustery weather. Materials for
the scaffolding cost about $400.
Our neighbor came over to give us an extra set of hands.
Separation!
Our scaffolding semi-collapsed under the weight, and required reinforcement. It was a combination of needing more support and the fact that the wood was green and inferior.
You can see in this photo just how much the crossbeam swayed.
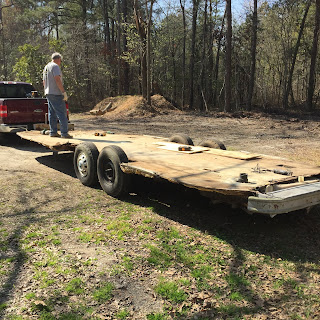
Then later in the afternoon we removed the subfloor from the trailer.
The trailer is just as bad as it possibly could be. The main channels
are broken completely in two in at least two places, most outriggers are
completely rotted off, and the frame is not salvageable. We are just
grateful we didn't try to tow this trailer anywhere. It only moved about
800 feet from our neighbors' house, and that's about as far as it could
have handled.
The frame is a huge mess.
No, that 2x4 is not standard in the steel frame.
So now we are taking measurements and putting together a bill of materials to order steel, axles, wheels, tires, bearings, brakes, coupler, and so on and so forth. We are going to do a slight redesign and improvements to the traditional frame.
I posted a few pictures to the Facebook group of our shell lift, and was immediately notified by knowledgeable Internet minds that the front wing windows of our shell indicate it's a 1969 not the 1975 that our title says. That explains the single hinge on the door as well. Obviously, based on our frame reveal, the shell has been off this frame before. The nonstandard use of wooden support in the frame sections makes it pretty clear that someone in the last fifty years tried to fix this trailer, but didn't know how.
Now we need to decide which tanks we want in the frame and where we'll put them, which direction our wiring needs to be routed, and get our orders placed for materials. We think we'll have $3500 in materials for the frame alone.
I had Dennis shoot another video to give you the update on the frame. I think the pictures will give you a better idea what we are getting into here. Also, today is his birthday, so it's a good idea to have a video.
Pandemic and Quarantine. Dennis has been diligently working on all aspects of our ITQAirstream that we've named "Sew Shiny." Since our last update was July 4, 2019, there's a lot to see. We uploaded three videos to walk you through his progress. Exterior Walk Around Part 1 Exterior Walk Around Part 2 Interior Update We are both able to stay really busy at home. He's usually in the shop doing his magic on the airstream build, and I'm typically in the house pretending that Q still does indeed stand for Quilts. I have finished two small projects during our stay-at-home sequester, and still have a few customer projects to finish this month. Things he forgot to mention in the video: He installed the awning arms (new from ZipDee) while we still have the walls out and he was able to get to the inside. He painted the top with polymeric paint after sealing everything really well. We installed the vent covers, including screen inside the refrigerator vent an...
Creepy mood lighting as we installed the center section of aluminum. That meant we had to drop our Harbor Freight lights to the floor until we got the cut outs for the vents/air conditioner and could hang them back up there. It's been a month since our last blog and video update, and we have been working on the interior walls this month. I am going to interrupt this post for this important public announcement: I am going to say "we" a lot in this blog. Please assume that is the royal we, and that Dennis did 99% of the actual work I mention in any description that follows. I am excellent when told "hold that right there" or "de-burr the holes on this piece" or even following behind him inserting Cleco clamps as he drills. Sometimes he let me do a little math to make me feel useful. Water Inlet installed next to the Outdoor Shower box that Dennis built Dennis finished all the wiring, installed the water inlet, the smart plug, and finished...


Comments
Post a Comment